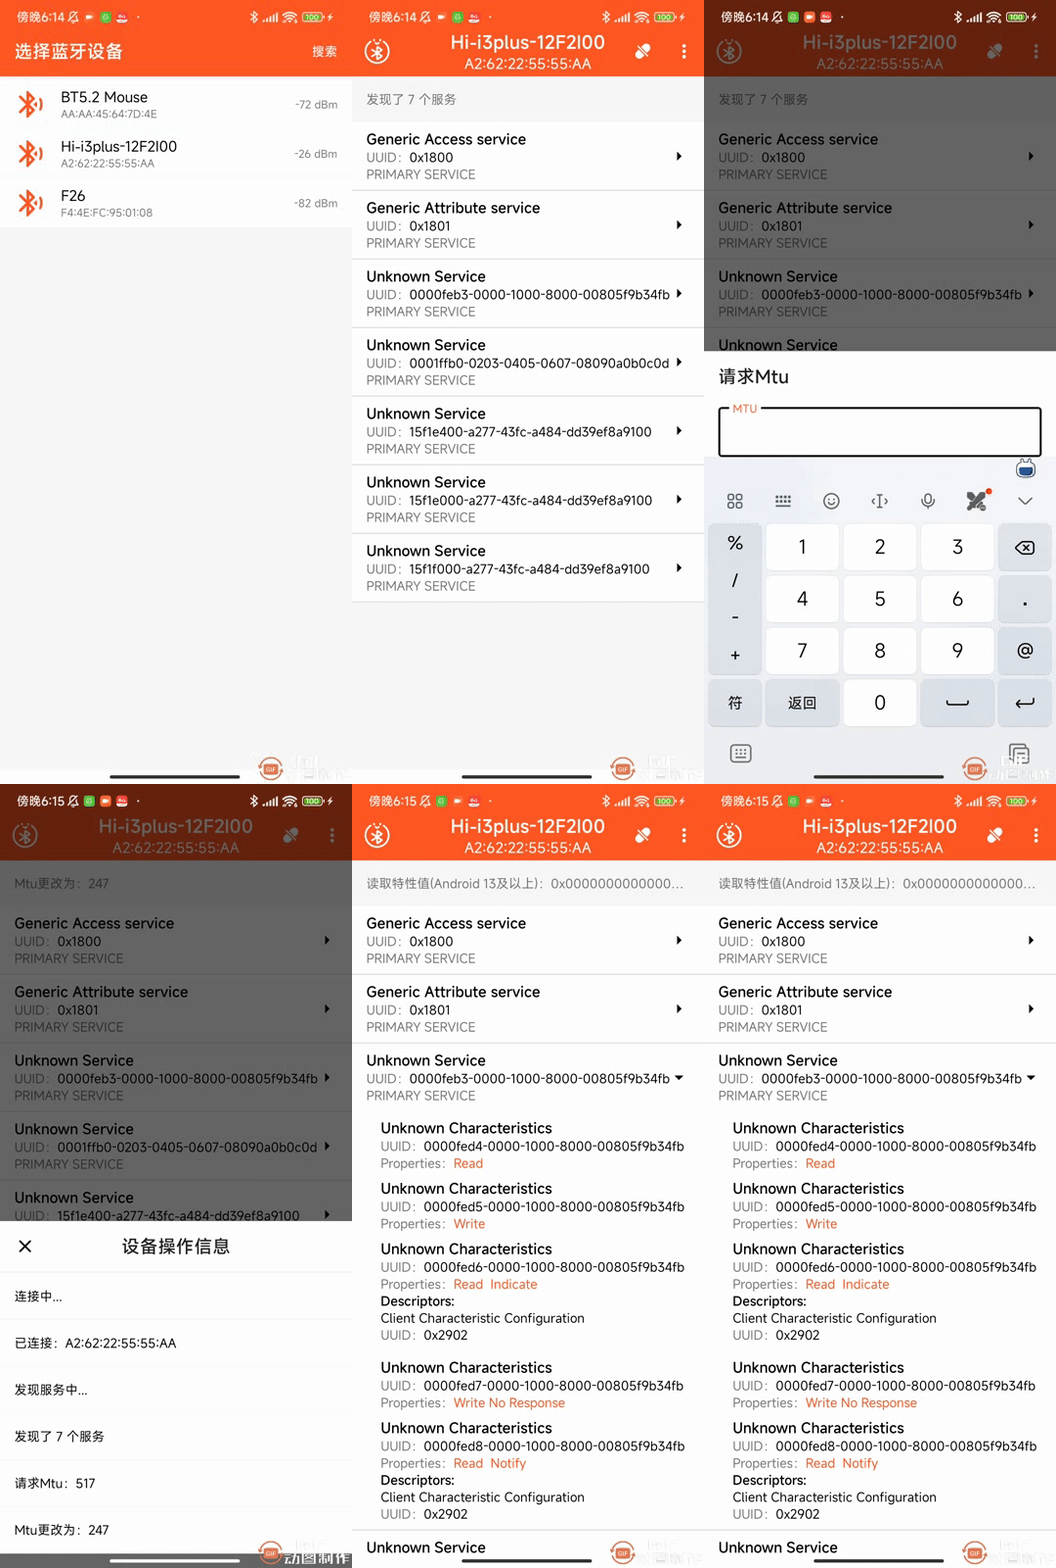
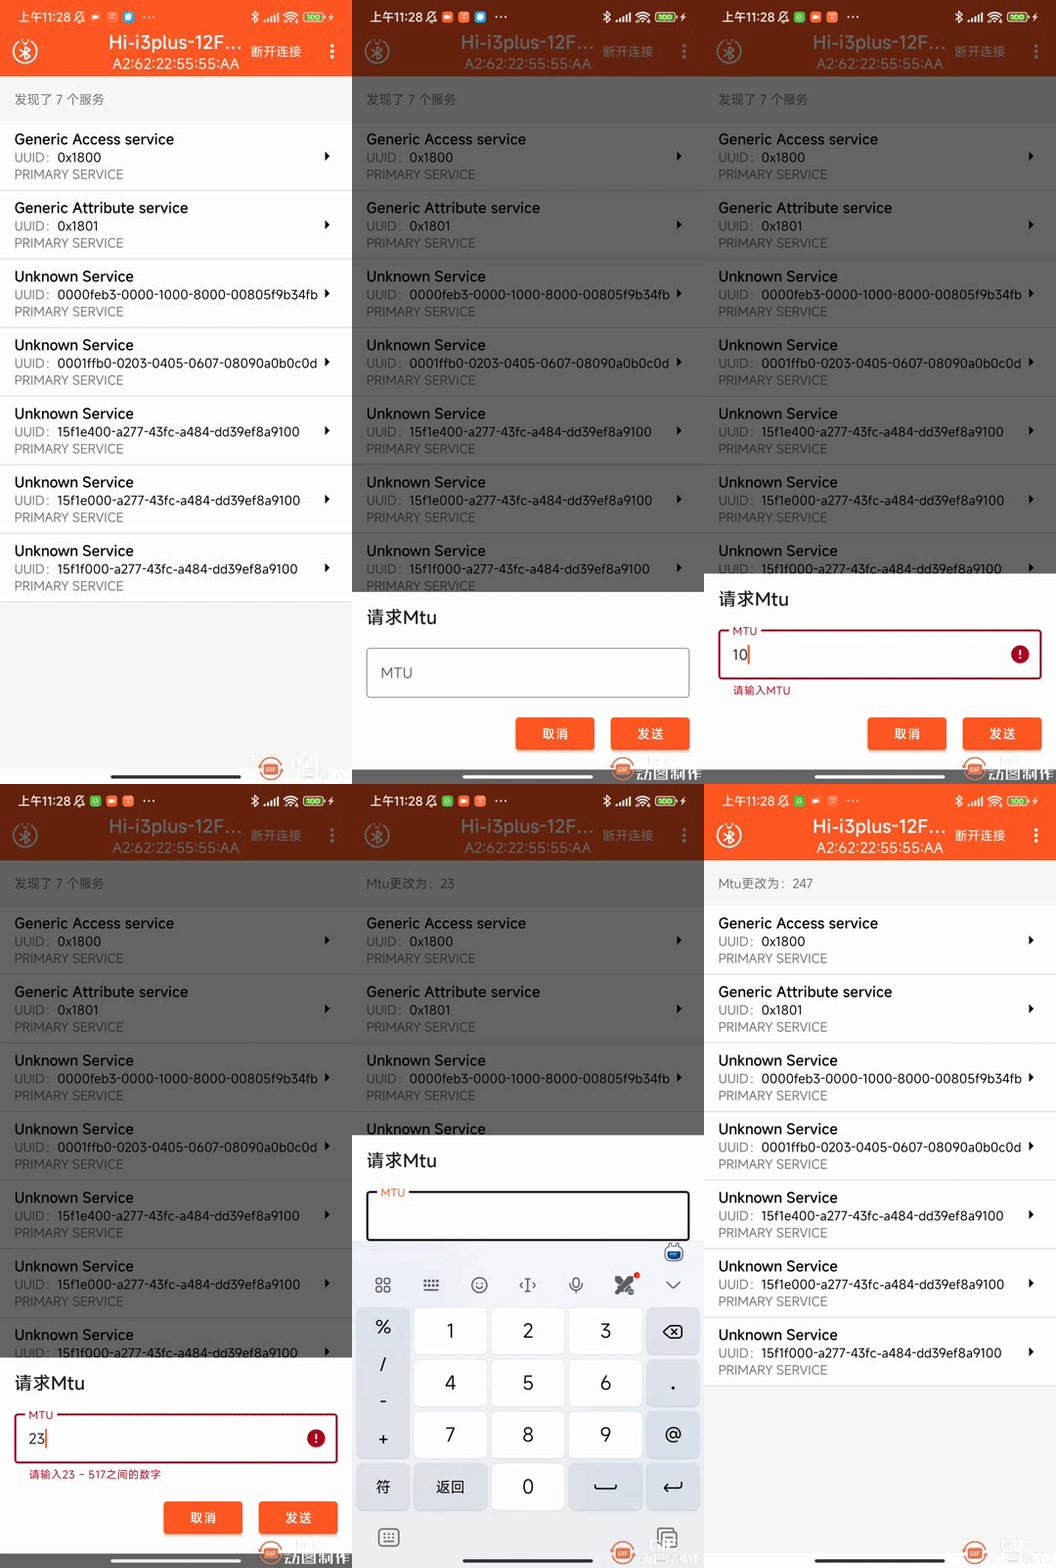
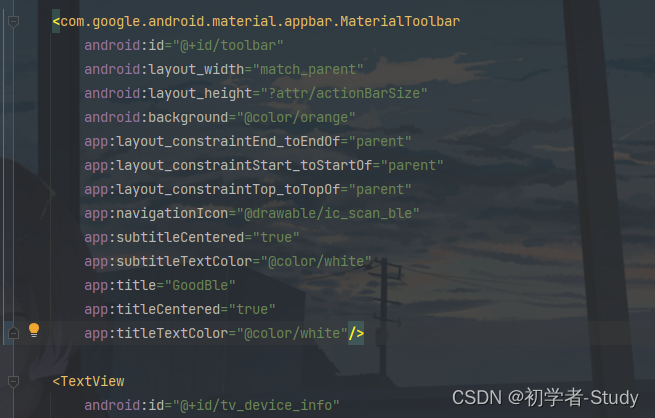
前言
在上一篇文章中已经了解了数据操作的方式,而数据交互的字节长度取决于我们手机与蓝牙设备的最大支持长度。

正文
本文中我们需要请求Mtu,然后做一些利用使用的UI改变,比如增加菜单,和显示设备操作信息。
一、请求MTU的概念
在 Android 的 BLE(Bluetooth Low Energy)开发中,requestMtu 是一个用于请求修改 BLE 连接的最大传输单元(MTU)的方法。MTU 是指在一个蓝牙数据包中能够传输的最大数据量。
通过调用 requestMtu 方法,你可以请求增加或减少 BLE 连接中的 MTU 大小。较大的 MTU 可以提高数据传输效率,因为每个数据包可以携带更多的数据。而较小的 MTU 可以降低延迟,因为数据可以更快地分割成较小的包进行传输。
获取MTU,蓝牙一般默认支持的MTU长度是23个字节,一个字节为类型操作码,两个字节为类型操作句柄,实际传输数据就是20字节。通过gatt.requestMtu(mtu)。会触发onMtuChanged回调。这里mtu 的范围在23 ~ 517之间,目前市面上Android版本高的手机基本上都是247。也就是说即使你mtu = 517,回调中的mtu可能还是247,为什么呢?因为你的Android手机上的蓝牙最大支持247。而在传输的时候你还需要-3,也就是244。单次传输的最大字节数据为244个字节。那么如果你有1000个字节需要进行传输,则需要对字节进行分包处理,例如一次最大传输244个字节,则需要分成5个包进行传输,前4个包,每个包为244个字节,最后一个包为24个字节。注意:在 Android 版本低于 5.0 的设备上,MTU 大小是固定的,无法通过此方法进行修改。
二、创建使用菜单
下面我们进行实操环节,首先我们需要增加一个请求MTU的入口,而当前页面上似乎并没有多余的入口了,那么我们就可以增加一个菜单了,首先在res下新建一个menu文件夹,在此文件夹下新建一个menu_main.xml文件,代码如下所示:
<menu xmlns:android="http://schemas.android.com/apk/res/android"
    xmlns:app="http://schemas.android.com/apk/res-auto">
    <item
        android:id="@+id/item_request_mtu"
        android:orderInCategory="200"
        android:title="请求Mtu" />
</menu>
然后去MainActivity中增加菜单,首先在onCreate函数中增加如下代码:
        //设置支持ActionBar
        setSupportActionBar(binding.toolbar)
因为我们在主题中使用的是NoActionBar,而菜单实际上就是在ActionBar上的,所以设置我们的ToolBar支持ActionBar即可,然后在MainActivity中重写下面两个方法:
    /**
     * 创建选项菜单
     */
    override fun onCreateOptionsMenu(menu: Menu): Boolean {
        menuInflater.inflate(R.menu.menu_main, menu)
        return true
    }

    /**
     * 选项菜单Item选中
     */
    override fun onOptionsItemSelected(item: MenuItem): Boolean {
        if (!bleCore.isConnected()) {
            showMsg("设备已断开连接")
            return false
        }
        when(item.itemId) {
            R.id.item_request_mtu -> showRequestMtuDialog()
        }
        return true
    }
这两个方法的意图很明显,一个创造菜单,一个监听菜单Item选中,在操作之前判断是否连接,在点击请求Mtu的菜单Item之后显示一个弹窗。
三、请求MTU弹窗
下面我们来写这个弹窗,首先在layout下创建一个dialog_request_mtu.xml文件,代码如下所示:
<?xml version="1.0" encoding="utf-8"?>
<androidx.constraintlayout.widget.ConstraintLayout xmlns:android="http://schemas.android.com/apk/res/android"
    xmlns:app="http://schemas.android.com/apk/res-auto"
    style="@style/Widget.MaterialComponents.TextInputLayout.OutlinedBox"
    android:layout_width="match_parent"
    android:layout_height="wrap_content"
    android:background="@color/white">

    <com.google.android.material.appbar.MaterialToolbar
        android:id="@+id/toolbar"
        android:layout_width="match_parent"
        android:layout_height="?attr/actionBarSize"
        app:layout_constraintEnd_toEndOf="parent"
        app:layout_constraintStart_toStartOf="parent"
        app:layout_constraintTop_toTopOf="parent"
        app:title="请求Mtu" />

    <com.google.android.material.textfield.TextInputLayout
        android:id="@+id/data_layout"
        style="@style/Widget.MaterialComponents.TextInputLayout.OutlinedBox"
        android:layout_width="match_parent"
        android:layout_height="wrap_content"
        android:layout_marginStart="16dp"
        android:layout_marginEnd="16dp"
        app:boxStrokeColor="@color/black"
        app:layout_constraintEnd_toEndOf="parent"
        app:layout_constraintStart_toStartOf="parent"
        app:layout_constraintTop_toBottomOf="@+id/toolbar">

        <com.google.android.material.textfield.TextInputEditText
            android:id="@+id/et_data"
            android:layout_width="match_parent"
            android:layout_height="wrap_content"
            android:digits="0123456789"
            android:hint="MTU"
            android:inputType="number"
            android:lines="1"
            android:singleLine="true" />
    </com.google.android.material.textfield.TextInputLayout>

    <Button
        android:id="@+id/btn_negative"
        android:layout_width="wrap_content"
        android:layout_height="wrap_content"
        android:layout_marginEnd="18dp"
        android:layout_weight="1"
        android:text="取消"
        app:layout_constraintEnd_toStartOf="@+id/btn_positive"
        app:layout_constraintTop_toTopOf="@+id/btn_positive" />

    <Button
        android:id="@+id/btn_positive"
        android:layout_width="wrap_content"
        android:layout_height="wrap_content"
        android:layout_marginTop="16dp"
        android:layout_marginBottom="16dp"
        android:layout_weight="1"
        android:text="发送"
        app:layout_constraintBottom_toBottomOf="parent"
        app:layout_constraintEnd_toEndOf="@+id/data_layout"
        app:layout_constraintTop_toBottomOf="@+id/data_layout" />

</androidx.constraintlayout.widget.ConstraintLayout>
你会发现这个布局内容和写数据弹窗如出一辙,但还是有区别的,你需要仔细观察一下,布局写好了,下面我们在MainActivity中增加一个显示弹窗的函数,代码如下所示:
    /**
     * 显示请求Mtu弹窗
     */
    private fun showRequestMtuDialog() {
        val dialog = BottomSheetDialog(this, R.style.BottomSheetDialogStyle)
        val mtuBinding = DialogRequestMtuBinding.inflate(layoutInflater)
        mtuBinding.btnPositive.setOnClickListener {
            val inputData = mtuBinding.etData.text.toString()
            if (inputData.isEmpty()) {
                mtuBinding.dataLayout.error = "请输入MTU"
                return@setOnClickListener
            }
            val mtu = inputData.toInt()
            if (mtu !in 23..517) {
                mtuBinding.dataLayout.error = "请输入23 ~ 517之间的数字"
                return@setOnClickListener
            }
            bleCore.requestMtu(mtu)
            dialog.dismiss()
        }
        mtuBinding.btnNegative.setOnClickListener {
            dialog.dismiss()
        }
        dialog.setContentView(mtuBinding.root)
        dialog.show()
    }
这个函数中唯一值得说的一点就是关于这个有效范围的判断,因为在概念中我们说过,mtu的范围在23 ~ 517之间,所以在输入之后我们做了一个校验,其余的就没啥好说的,校验通过之后就会调用bleCore.requestMtu(mtu)去请求Mtu,当前我们还没有这个方法,所以我们去BleCore中增加。
四、请求MTU与回调
在BleCore中增加一个requestMtu()函数,代码如下所示:
    /**
     * 请求Mtu
     * @param mtu 23 ~ 517
     */
    fun requestMtu(mtu: Int) {
        deviceInfo("请求Mtu:$mtu")
        mGatt?.requestMtu(mtu)
} 而调用了Gatt的requestMtu()函数,则会触发onMtuChanged()回调函数,在BleGattCallback中增加onMtuChanged()函数,代码如下所示:
        /**
         * 请求Mtu回调
         */
        override fun onMtuChanged(gatt: BluetoothGatt, mtu: Int, status: Int) {
            if (status != BluetoothGatt.GATT_SUCCESS) return
            deviceInfo("Mtu更改为:$mtu")
        }
现在你运行一下应该是可以看到菜单的三个点的,只不过这个点是黑色的,而我们的标题栏背景是橙色的,所以这个黑色就不是很搭,因此我们需要修改一下这三个点的颜色,改成白色。
五、修改菜单
首先我们在themes.xml中增加如下代码:
    <style name="MyOverflowButtonStyle" parent="Widget.AppCompat.ActionButton.Overflow">
        <item name="android:tint">@color/white</item>
</style> 这是一个菜单图标的样式,android:tint就是添加一个颜色,可以说是覆盖一个颜色,比如原来是黑色,那么我再涂成白色。然后在GoodBle主题样式中增加这一行代码:
    <style name="Theme.GoodBle" parent="Theme.MaterialComponents.DayNight.NoActionBar">
        ...
        <item name="android:actionOverflowButtonStyle">@style/MyOverflowButtonStyle</item>
    </style>
如果你还有深色模式的适配的话,建议将深色模式主题下的改动同步一下,下面我们运行一下看看效果:

请求Mtu确实如同我们所想的那么,但是标题栏哪里就不太好看了,因为断开连接的文字影响了主标题的显示,针对这种情况,有多种选择,我们可以将断开连接的操作方式放到菜单里,这样就不占标题的位置,下面我们操作一下。
首先修改menu_main.xml,在里面增加一个item,代码如下所示:
<menu xmlns:android="http://schemas.android.com/apk/res/android"
    xmlns:app="http://schemas.android.com/apk/res-auto">
    <item
        android:id="@+id/item_disconnect"
        android:orderInCategory="200"
        android:visible="false"
        android:title="断开连接" />
    <item
        android:id="@+id/item_request_mtu"
        android:orderInCategory="200"
        android:title="请求Mtu" />
</menu>这里默认设置断开连接Item不显示,然后进入到activity_main.xml中将之前Toolbar中的TextView去掉。

再回到MainActivity中,首先声明一个变量
private lateinit var mMenu: Menu然后在onCreateOptionsMenu()函数中赋值
    override fun onCreateOptionsMenu(menu: Menu): Boolean {
        menuInflater.inflate(R.menu.menu_main, menu)
        mMenu = menu
        return true
}修改断开连接Item的点击事件,改动onOptionsItemSelected()函数中的代码,如下所示:
    override fun onOptionsItemSelected(item: MenuItem): Boolean {
        if (!bleCore.isConnected()) {
            showMsg("设备已断开连接")
            return false
        }
        when(item.itemId) {
            R.id.item_disconnect -> bleCore.disconnect()
            R.id.item_request_mtu -> showRequestMtuDialog()
        }
        return true
} 然后去掉之前所写好的id为tv_disconnect的TextView控件的点击事件,同时修改onConnectionStateChange()函数中的代码:
    override fun onConnectionStateChange(state: Boolean) {
        runOnUiThread {
            if (state) {
                //binding.tvDisconnect.visibility = View.VISIBLE
                mMenu.findItem(R.id.item_disconnect).isVisible = true
                ...
            } else {
                //binding.tvDisconnect.visibility = View.GONE
                mMenu.findItem(R.id.item_disconnect).isVisible = false
                ...
            }
        }
} 这里就是把控件的显示隐藏换成Item的显示和隐藏,下面你其实就可以运行了,不过还有很好的方式,那就是让我们的断开连接item在toolbar有空间的时候显示在Toolbar上,没有空间的时候就在菜单弹窗里面,我们先弄一个断开连接的图标,在drawable下创建一个ic_disconnect.xml,代码如下所示:
<vector xmlns:android="http://schemas.android.com/apk/res/android"
    android:width="48dp"
    android:height="48dp"
    android:viewportWidth="1024"
    android:viewportHeight="1024">
  <path
      android:pathData="M288.9,527.8c-56.1,56.1 -56.1,148.7 0,204.8s148.7,56.1 204.8,0l80.5,-80.5 -204.8,-204.8 -80.5,80.5zM741.2,280.4c-56.1,-56.1 -148.7,-56.1 -204.8,0l-80.5,80.5 204.8,204.8 80.5,-80.5c57.3,-56.1 57.3,-148.7 0,-204.8zM315.3,340.5l34.5,-34.5 367.2,367.2 -34.5,34.5z"
      android:fillColor="#ffffff"/>
</vector>
下面再修改一下item_disconnect的内容,代码如下所示:
    <item
        android:id="@+id/item_disconnect"
        android:icon="@drawable/ic_disconnect"
        android:orderInCategory="200"
        android:title="断开连接"
        android:visible="false"
        app:showAsAction="ifRoom" />
常见的 showAsAction 的取值包括:
- never:表示菜单项将不显示在工具栏中,而是隐藏在溢出菜单中。
- ifRoom:表示如果有足够的空间,菜单项将显示在工具栏中,否则将显示在溢出菜单中。
- always:表示菜单项始终显示在工具栏中,即使没有足够的空间。它将占据工具栏中的可用空间,可能会挤占其他工具栏元素。
- withText:与 always 类似,但会同时显示菜单项的文本标签。
下面你可以再运行看一下效果,我就不运行了。
六、显示设备信息
先说说为什么要显示设备操作信息,因为这可以方便我们测试一些功能,虽然我们可以在控制台看到所有内容,不过终究不是时时刻刻都是调试的,也有直接使用的情况,那么针对这个需求,我们可以在主页面中点击设备信息是显示一个设备信息列表弹窗,首先要做的是创建一个item布局,在layout下创建item_device_info.xml,代码如下所示:
<!--?xml version="1.0" encoding="utf-8"?-->
然后再创建一个适配器,在adapter下新建一个InfoAdapter,代码如下所示:
class InfoAdapter(
    private val mLists: List
) : RecyclerView.Adapter() {

    override fun onCreateViewHolder(parent: ViewGroup, viewType: Int): ViewHolder {
        return ViewHolder(ItemDeviceInfoBinding.inflate(LayoutInflater.from(parent.context), parent, false))
    }

    override fun onBindViewHolder(holder: ViewHolder, position: Int) {
        holder.binding.tvDeviceInfo.text = mLists[position]
    }

    override fun getItemCount() = mLists.size

    class ViewHolder(itemView: ItemDeviceInfoBinding) : RecyclerView.ViewHolder(itemView.root) {
        var binding: ItemDeviceInfoBinding

        init {
            binding = itemView
        }
    }
}
下面创建弹窗布局,在layout下创建一个dialog_device_info.xml,代码如下所示:
<?xml version="1.0" encoding="utf-8"?>
<LinearLayout xmlns:android="http://schemas.android.com/apk/res/android"
    xmlns:app="http://schemas.android.com/apk/res-auto"
    android:layout_width="match_parent"
    android:background="@color/gray_white"
    android:layout_height="wrap_content"
    android:orientation="vertical">

    <com.google.android.material.appbar.MaterialToolbar
        android:id="@+id/toolbar"
        android:layout_width="match_parent"
        android:layout_height="?attr/actionBarSize"
        android:background="@color/white"
        app:navigationIcon="@drawable/ic_close_24"
        app:title="设备操作信息"
        app:titleCentered="true" />

    <androidx.recyclerview.widget.RecyclerView
        android:id="@+id/rv_device_info"
        android:layout_width="match_parent"
        android:layout_height="wrap_content"
        android:layout_marginTop="2dp" />

</LinearLayout>
同时我们修改一下activity_main.xml中的显示设备信息的控件,修改后代码如下所示:
    <TextView
        android:id="@+id/tv_device_info"
        android:layout_width="0dp"
        android:layout_height="wrap_content"
        android:ellipsize="end"
        android:foreground="?attr/selectableItemBackground"
        android:padding="16dp"
        android:singleLine="true"
        app:layout_constraintEnd_toEndOf="parent"
        app:layout_constraintStart_toStartOf="parent"
        app:layout_constraintTop_toBottomOf="@+id/toolbar" />
主要改动就是单行显示,增加点击效果,同时多出来的内容省略掉,下面回到MainActivity中增加一个显示设备操作信息弹窗的函数,代码如下所示:
    /**
     * 显示设备信息弹窗
     */
    private fun showDeviceInfoDialog(mInfoList: MutableList) {
        val dialog = BottomSheetDialog(this, R.style.BottomSheetDialogStyle)
        val infoBinding = DialogDeviceInfoBinding.inflate(layoutInflater)
        infoBinding.toolbar.setNavigationOnClickListener { dialog.dismiss() }
        infoBinding.rvDeviceInfo.apply {
            layoutManager = LinearLayoutManager(this@MainActivity)
            adapter = InfoAdapter(mInfoList)
        }
        dialog.setContentView(infoBinding.root)
        dialog.show()
    }
然后在MainActivity中声明一个变量:
private val mInfoList: MutableList = mutableListOf()然后需要在回调中添加数据,在断连时清除数据:
    override fun deviceInfo(info: String) {
        runOnUiThread {
            binding.tvDeviceInfo.text = info
            mInfoList.add(info)
        }
    }

    override fun onConnectionStateChange(state: Boolean) {
        runOnUiThread {
            if (state) {
                ...
            } else {
                mMenu.findItem(R.id.item_disconnect).isVisible = false
                ...
                mInfoList.clear()   //清除Info列表
            }
        }
}最后在onCreate()函数中增加设备信息TextView的点击监听,代码如下所示:
    override fun onCreate(savedInstanceState: Bundle?) {
        ...
        //设备信息
        binding.tvDeviceInfo.setOnClickListener { if (mInfoList.size > 0) showDeviceInfoDialog(mInfoList) }
    }
如果列表有数据就显示弹窗,下面我们运行一下看看:

文章来源于互联网:Android Ble蓝牙App(六)请求MTU与显示设备信息
1、本站所有资源均从互联网上收集整理而来,仅供学习交流之用,因此不包含技术服务请大家谅解!
2、本站不提供任何实质性的付费和支付资源,所有需要积分下载的资源均为网站运营赞助费用或者线下劳务费用!
3、本站所有资源仅用于学习及研究使用,您必须在下载后的24小时内删除所下载资源,切勿用于商业用途,否则由此引发的法律纠纷及连带责任本站和发布者概不承担!
4、本站站内提供的所有可下载资源,本站保证未做任何负面改动(不包含修复bug和完善功能等正面优化或二次开发),但本站不保证资源的准确性、安全性和完整性,用户下载后自行斟酌,我们以交流学习为目的,并不是所有的源码都100%无错或无bug!如有链接无法下载、失效或广告,请联系客服处理!
5、本站资源除标明原创外均来自网络整理,版权归原作者或本站特约原创作者所有,如侵犯到您的合法权益,请立即告知本站,本站将及时予与删除并致以最深的歉意!
6、如果您也有好的资源或教程,您可以投稿发布,成功分享后有站币奖励和额外收入!
7、如果您喜欢该资源,请支持官方正版资源,以得到更好的正版服务!
8、请您认真阅读上述内容,注册本站用户或下载本站资源即您同意上述内容!
原文链接:https://www.dandroid.cn/archives/21080,转载请注明出处。


评论0